1,565,440 domains pop up when you search "guest post" on Ahrefs, so there is no shortage of prospects; the real pain is finding the best prospects with the least effort.
So we're boiling down our decade of experience with guest posting into 4 key steps with simple and fast ways to perform each step.
Step 1: Identify Your Keywords
You want to target blogs that already write about topics in your industry, and that starts with curating a list of seed keywords.
The low-hanging keywords you can come up with on your own, but if you have writer's block, try this free tool:
Using Keyword Sheeter

- Navigate to Keyword Sheeter: Go to Keyword Sheeter.
- Enter a Seed Keyword: Input a basic keyword that represents your niche. Example: If you're interested in "photography," type that in.
- Generate Keywords: Click on “Sheet Keywords” to start the keyword generation process.
- Observe and Wait: The tool will create a list of related keywords.
- Select Relevant Keywords: Look for long-tail and specific phrases that match your guest posting interests.
- Export Your List: Use the option to download the list or copy the most relevant keywords manually.
If generating 100s of keyword ideas is overkill, using Google is another great free way to proceed.
Using Google Autosuggest

- Open Google and start typing your basic keyword.
- Note the autocomplete suggestions provided by Google.
- Jot down keywords that are relevant to your guest posting goals.
Start Narrow: Start narrow within your niche to get the most relevant sites first. On subsequent campaigns, you can expand.
Once you've built a list of keywords within a notepad or Google Sheet, move onto step 2.
Step 2: Craft Your Search Queries
Take the list of keywords and paste them here. The tool will pair each of your terms with popular guest post search operators like “write for us,” “guest post,” “guest article,” “contributing writer,” “submit a guest post,” or “guest post guidelines.”
- Keyword(s): You can enter any keyword related to your guest posting interest.
- Region: This option can be set to target specific geographical areas or countries.
- Language: You can filter websites based on the language of their content.
- TLD (Top-Level Domain): This feature allows you to specify the type of website domains you're interested in (like .com, .org, .edu, etc.), or you can search across all domain types.
- Results per Page: You can adjust how many search results you want to view per page.
- Article Last Published: This filter lets you select websites based on the recency of their content publication.
Results
We're creating search operators that'll work with popular search engines like Google and Ahrefs. They help in narrowing down search results and finding more relevant information.
Step 3: Perform Searches
Using Google Search
Google is the ultimate free way to find prospects. Click each of the outputs from the tool below, and you'll be taken to its Google search page. Create a bookmarklet in Chrome to make it easier to grab the search results.
Using a Custom Bookmarklet to Aggregate Search Results
- Create the Bookmarklet:
- Open your browser and right-click on the bookmarks bar.
- Select "Add Page" or "Add Bookmark" depending on your browser.
- Name it something like "Extract Search URLs."
- Add the JavaScript Code:
- In the URL or Location field of the new bookmark, paste the JavaScript code provided:
javascript:(function() { var urls = Array.from(document.querySelectorAll('.tF2Cxc .yuRUbf a')).map(a => a.href); var existingWindow = window.open('', 'extractedURLs'); if (!existingWindow.urlsList) { existingWindow.urlsList = []; } existingWindow.urlsList = existingWindow.urlsList.concat(urls); existingWindow.document.body.innerHTML = '' + existingWindow.urlsList.join('\n') + '';})();
- How to Use the Bookmarklet:
- Perform your Google search using one of your crafted queries.
- Once the results are displayed, click the "Extract Search URLs" bookmarklet.
- A new window will open, listing all the URLs from the search results.
- Perform another search and those results too will get added to this list
- You can then copy these URLs and paste them into a spreadsheet or document for organization.
2: Using Apify for Automated Scraping
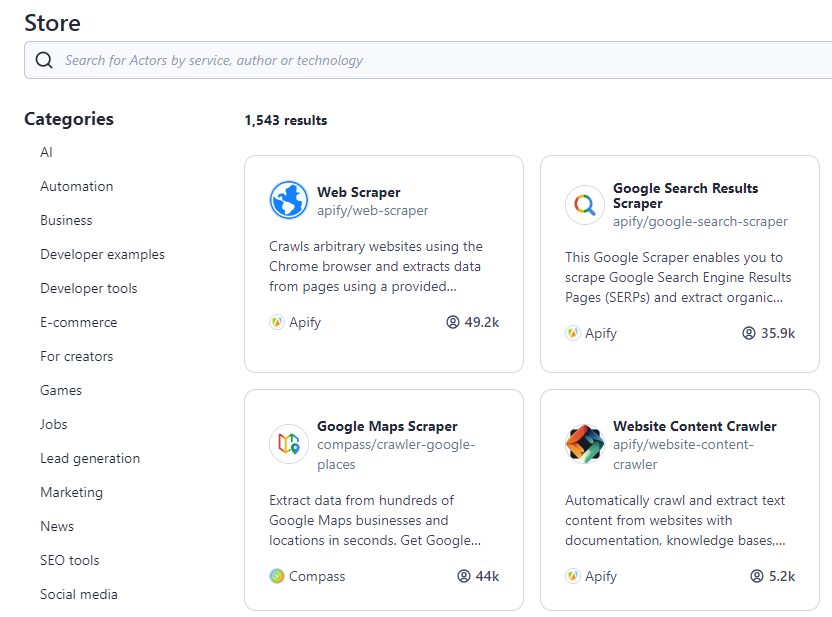
Using Apify's Google Scraper
Sign Up for Apify:Go to Apify and create an account. The first $5 worth of usage per month is free.
With Apify, developers can easily create, deploy, and manage web scrapers and browser automation tools for fast and reliable results.

After you've created your account, go to the dashboard to start creating your keyword scraping campaign. On the dashboard, you will notice various types of campaigns. Choose "Google Search Results Scraper" from the list.

Fill in the "Search terms or URLs" box with your keywords. Set Max pages per search term or URL to 2 in the following box. Also, set the number of results per Google page to 100. With these settings, you will get 200 potential results per search.
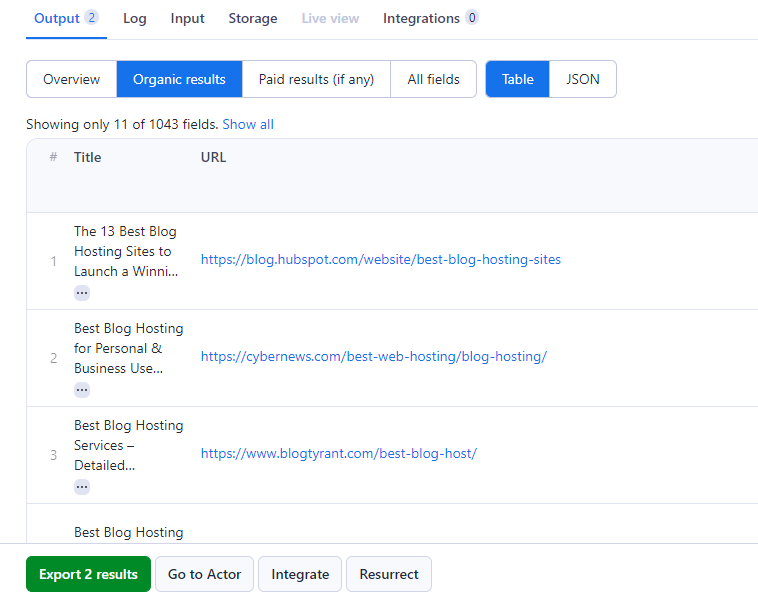
Press the Save and Start buttons now. I will use the keyword "Web hosting blog" for this tutorial.

Select Organic Results and then export. It will take you to the Export dataset page, where you can select the Excel format and organic results in the Selected fields box.
After that, download the file.

The free credits get you about 1000 searches monthly - more than enough if you're working on just one website.
I've started to use Google scraping more frequently than Ahref's Content Explorer over the past year because, while Ahrefs is great for its ease and metrics, Google still returns better sites, whereas Ahref's has a lot of spam in their results.
Step 4: Vetting and Prioritizing Guest Post Prospects
If you have a small list of sites, simple focus on steps 2 and 3 to create step 4. However, if you've built a huge list, there's some elemtns of bulk filtering required.
Step 1: Initial Filtering of the List
- Open Your Spreadsheet: Start with the list of potential sites you've gathered.
- Quick Relevance Check: Skim through the list and remove any sites that obviously don't align with your niche or topic.
- Bulk Filtering Tool: Use this bulk filtering tool to quickly remove unqualified prospects based on xyz critiera. https://filter.onlyoutreach.com/
Step 2: Using Free Chrome Extensions for Quick Analysis
- Install Extensions: Add free Chrome extensions like MozBar and SimilarWeb.
- Check Domain Authority: Use MozBar to quickly see the Domain Authority (DA) of each site. Set a DA threshold (e.g., DA 25+) to narrow down your list.
- Assess Traffic: SimilarWeb can give you a quick overview of a site's traffic levels and sources, helping you gauge its popularity and reach.
Step 3: Deeper Analysis of Remaining Sites
- Content Quality Check: Manually review a few recent posts on each site for quality and relevance.
- Engagement Assessment: Look for signs of active engagement like comments and social media shares.
- Guest Post Guidelines: Identify whether the site has clear guidelines for guest posting.
- Contact Information: Check if the site provides straightforward contact information or a submission form for guest posts.
Step 4: Creating a Shortlist
- Rank the Sites: Based on your analysis, rank the sites in terms of relevance, DA, audience engagement, and overall fit for your content.
- Shortlist the Best: Select the top sites (e.g., top 10 or 20) that you believe offer the best opportunity for your guest post.
- Prepare for Outreach: For each site on your shortlist, note down specific reasons why your content would be a good fit, along with any ideas tailored to their audience or content style.
Additional Tips
- Efficiency is Key: The goal is to quickly eliminate sites that are unlikely to accept your guest post or wouldn’t add value to your goals.
- Quality Over Quantity: Prioritize sites that have the potential to provide the most benefit in terms of audience engagement and credibility.


